After a lot of debate, I decided to go ahead and make Gun Ports as the ship had in the 18th Century.
First on installed Added HingesStbd and Port Bow Gun Ports
So, I found that I can take a Razor and cut the shape out. I go down a couple layers. Then I thin out the Gun Port Doors by using some Alien Tape and putting the Door on the end of a Dowel to thin it down on my Sander.
After that, I glue in the Hinges after hooking them into the top of the Gun Port Door.
Gun Port on end of Dowel with Alien TapeStbd side fwd Port side fwd
My first Gun Port. I figured I better cut all of these out before I do the Painting.
The Gun Port itself is 12x12mm.
For the Gun Port Doors, I’m making some. This kit didn’t really provide the adequate parts so I had to make my own out of spare Lumber that I have.
Making Gun Port DoorsX-Acto with #24 Blade
X-Acto #24 Precision Blades is my main tool for this. I carefully push it into the wood. Unfortunately for this first Door, I went right into a Bulkhead!!! .. 🤔🙄😲
As you can see, I used some Masking Tape, which I cut right through! ..
Starboard sideMarking it out
I’m really annoyed with myself that I accidentally made the 4 Stern most Gun Ports too big. They are supposed to be 10mm Square and I made them 12mm Square and 13 in one case!!! .. Why did I do that???!!! .. Fuck if I know!!! .. 🤔🙄😲
So annoyed with myself!!!
The 2 Forward most Gun Ports are 10mm Square though.
Port side is correct… I screwed up on the Starboard side but I am not going to mention it because it will be barely noticeable…
Started work on the Lower Gun Deck. These Gun Ports have a Faux Cannon that I stick into those Basswood blocks that I made before.
Bits ..I temporarily stuck a Gun into the Basswood BlockFitting Block behind Gun Port. The Block should be 17″ from the edge of BullheadGluing in the blocks
I use a combination of Dap Weldwood Contact Cement and SuperGlue for this.
All the faux-Cannon backs installedThe faux back painted
I found that around 17mm from the edge was the idea distance for the Cannons to protrude.
The Kit didn’t specify using blocks behind the Gun Ports. They wanted the builder to figure it I suppose. I had some spare 25mm Basswood Blocks lying around which I used for this.
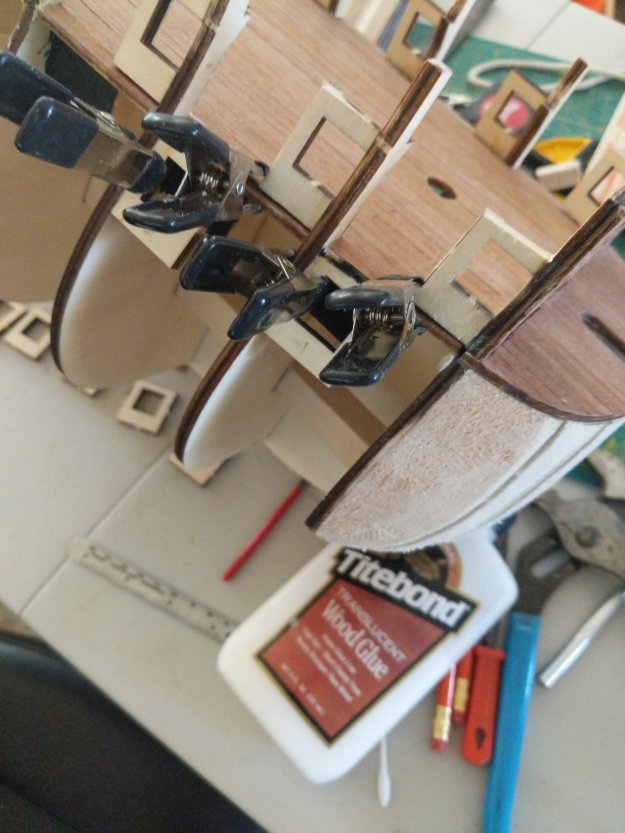
I used Titebond TranslucentClamping them in with Titebond
So these Gun Port Doors. They require custom work on all of them because I first have to adjust the Widths so that they’re the same as the Gun Ports.
I figured out that if I make the “Hinges” the little slat that I glue on the end and put 2 wires to simulate Hinges. I taper these 2 Slates so that when I insert them into the Gun Ports, they slide right in.
Last 2 left on Starboard side…Gun Ports Starboard side done…