


Soaked these Battens to be able to bend around the Bluff Bow.

On the Widest Bulkhead, the Batten goes out 70mm or 14 5mm Planks.
Just chiseled out some Rabbets for the Garboard Strake…


I had these next 2 Strakes soaking since yesterday so it has been close to 24 hours!


I’m kind of sick of what happened… I had to use a Cheater on the Port Side which doesn’t even up with the Starboard…
Meh… Most of the Ships had some sort of unevenness.

I had to make a long Cheater for Strake #3 in order to even it out.
I ordered some .6x5mm Maple Wood for the 2nd Planking.

I just made 1 long piece and bent it around the Hull for these initial Strakes.




I miscalculated the Port Side Planks a bit so I have to add a Cheater.

On a vessel’s hull, a strake is a longitudinal course of planking or plating which runs from the boat’s stempost (at the bows) to the sternpost or transom (at the rear). The garboard strakes are the two immediately adjacent to the keel on each side.

A clinker-built Viking longship, whose overlapping planks constitute “strakes”.

Garboard strakes and related near-keel members

Diagram of typical modern metal-hulled ship’s exterior plating, with a single strake highlighted in red
The word derives from traditional wooden boat building methods, used in both carvel and clinker construction. In a metal ship, a strake is a course of plating.
In small boats strakes may be single continuous pieces of wood. In larger wooden vessels strakes typically comprise several planks which are either scarfed, or butt-jointed and reinforced with a butt block. Where the transverse sections of the vessel’s shape are fuller, the strakes are wider; they taper toward the ends.
In a riveted steel ship, the strakes were usually lapped and joggled (one strake given projections to match indentions in the one adjoining), but where a smoother finish was sought they might be riveted on a butt strap, though this was weaker. In modern welded construction, the plates are normally butt-welded with full penetration welds all round to adjoining plates within the strake and to adjoining strakes.
In boat and ship construction, strakes immediately adjacent to either side of the keel are known as the garboard strakes or A strakes. The next two are the first broad or B strake and second broad or C strake. Working upward come the bottom strakes, lowers, bilge strakes, topside strakes, and uppers also named sequentially as the D strake, E strake, etc. The uppermost along the topsides is called the sheer strake. Strakes are joined to the stem by their hood ends.
A rubbing strake was traditionally built in just below a carvel sheer strake. It was much less broad but thicker than other strakes so that it projected and took any rubbing against piers or other boats when the boat was in use. In clinker boats, the rubbing strake was applied to the outside of the sheer strake. Many current pleasure craft reflect this history in that they have a mechanically attached (and therefore replaceable) rub rail at the location formerly occupied by a rubbing strake, often doubling to cover the joint between a GRP hull and its innerliner. Inflatable dinghies and RIBs usually have a rubbing strake (typically a glued-on rubber extrusion) at the edge.
A “stealer” is a short strake employed to reduce the width of plank required where the girth of the hull increases or to accommodate a tuck in the shape. It is commonly employed in carvel and iron/steel shipbuilding, but very few clinker craft use them.

I undercut the 3x7mm Manzonia. I had to add about 1.5mm to the end… Which was a pain but worth it because the undercut was noticeable.


I used Contact Cement and Superglue on the Starboard Side and White Glue on the Port Side…
Both sides have a slight outward Angle which I don’t mind.

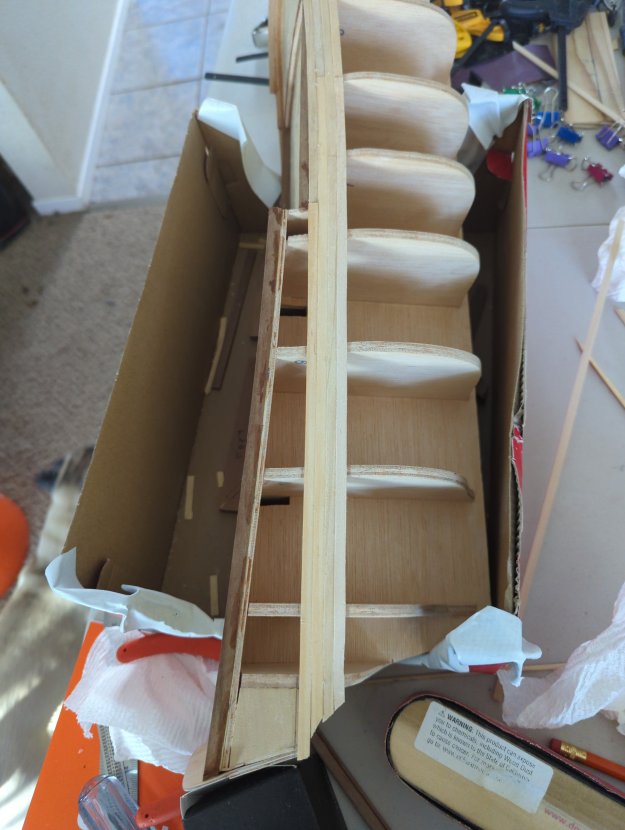
Using some 3mm x 7mm Manzonia for the Main Deck Bulwarks…


Cutting it perfectly was a trick. I go just a smidgen over and use a file to bring it down.
I also used Contact Cement and Superglue for this.
This is my Work Space in my Living Room. I like it all here. If I had it in another room, I’m liable to neglect it… 🤔🙄

The pieces for the Bulwarks provided by Artesania Latina were these big blocks of wood with a laser cut that only traced the line of the Bulwarks and they were much too thick and easily broken.

I decided to make some different Bulwarks by bending some 1.5 x 5mm wood instead.


I used some Contact Cement and then used some CA Glue.

I think a thinner piece of stock gives it a more authentic look… 🤔🙄


