Temporary Wale

I have been touching up with the Sanding and looking at the bare sanded ship now for a better part of two days. .. Thinking about how the next stage is going to go. 🙄🤔

Blank 1st Planking

This next Stage is pretty interesting but it takes a bit of preplanning.

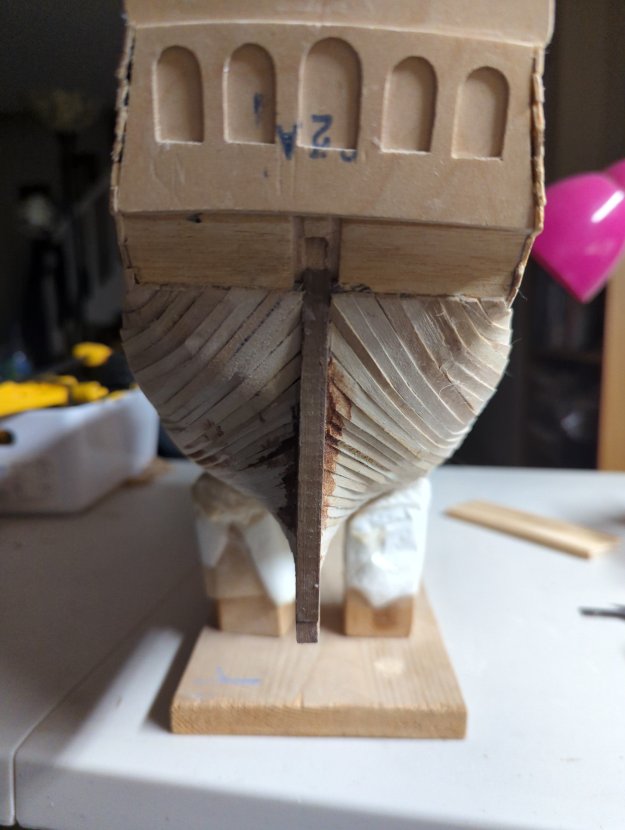
First, I have to determine the line where the Wale, aka Rubbing Strakes, is going to run.

46mm to the top of the Wales

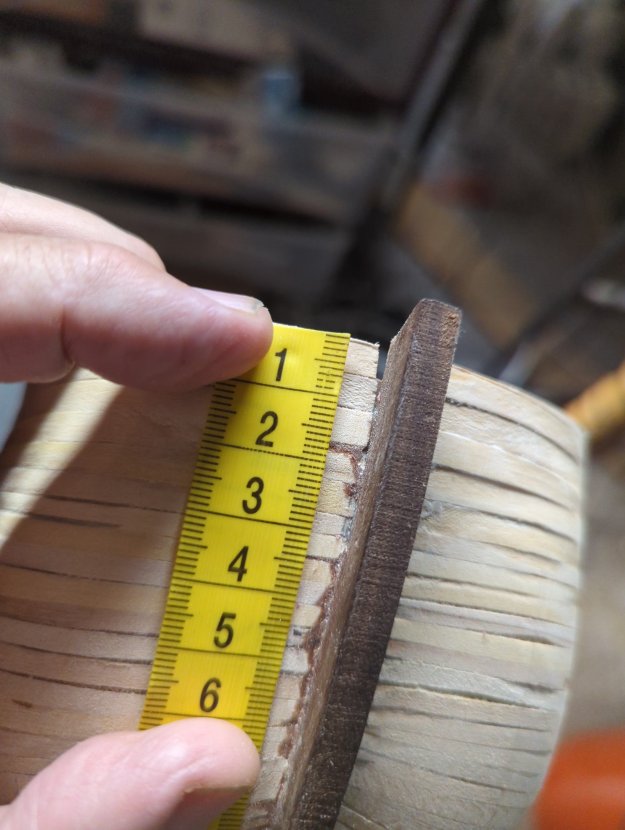
From the top of the Forecastle Bulwarks to the beginning of the top of the Wales is 46mm.

Temporary Wale with Pins
Starboard side Temporary Wale

I did take some measurements but mostly I did it by eyeballing it and gave the Wale a nice bend to make it look more rakish and nautical.

Facebook Comments Box

DAP Plastic Wood

I had a couple of spots that I needed to use this DAP Plastic Wood as Wood Putty.

Check out the Hyperlink for a link to DAP.

DAP Plastic Wood

I used it on my Bow at the very bottom where the fairing needed straightening out.

Putty on Bow Port side
Bow Starboard side

And on the Stern for a couple of Spots…

Stern Port side
Stern Starboard

The idea is to use as little Putty as possible. Which is why I bought the 3oz Tube. It tends to dry out if you leave it for too long. 🤔🙄

Facebook Comments Box

Bulwarks

After following the Instructions and the diagrams, I have come to find out that the Instructions were very deficient! ..

Now I’m having to rework the Bulwarks on both the Quarterdeck and Poop Deck, Main Deck and the Forecastle.

Gluing in Plank against the Bulwarks
Bending Plank for Forecastle Bulwarks
Made a little Wedge to raise the Bulwark up 1 mm
Clamping in

I will Plane the excess down and sand it.

Bulwarks forward part of Ship
Bulwarks Stern portion
Facebook Comments Box

Sanding

Stern Pre-Sanding

I went over the entire Ship with 120 Grit. Now, I’m going through with my 220 Grit and just using Sandpaper without a Block.

Starboard side Pre-Sanding
So far…
Port side Pre-Sanding
Port side so far
Stuff like this I try to sand out
Bow Pre-Sanding
Bow so far

Me Sanding the Hull . ..

Sanding the Hull
Facebook Comments Box

Wooden Stand ..

Wooden Stand

I threw out the old Cardboard Shoe Box that I was using. ..

I built this simple Wooden Stand around 3 or 4 Ships ago… . 🤔🙄

Facebook Comments Box

Finished Planking the Hull and begin Sanding

Hull (kind of) before Sanding

I simply couldn’t resist and started Sanding before I got all the Upper Deck Sides in. It was just irresistible. 🙄🤔

I use 120 Grit Sandpaper that is supposed to go on a Sander but I cut it down to fit these Micro-Mark Hand Sanders.

Micro-Mark Sanders
Port side finished
Starboard side
From the Bow
Stern

Mind you, this is all Pre-Sanding.

Starboard side Sides of Upper Deck
Port side

Those Straight Planks only needed to be Plane-d.

The only thing that required waiting was for the Contact Cement to dry.

Nun

Sanding
Slowly getting there…

🤔🙄👍

Facebook Comments Box

Superglue or CA Glue

My favorite Superglues

That’s the Applicator on the right to get into tight spaces.

Superglue is great for certain applications.

I use it for small parts. Contrary to Planking, which I use Titebond Translucent Wood Glue.

You can also use Superglue when you’re desperate to attach a couple of pieces together in a hurry.

Just don’t get it on your fingertips. If you do, use Acetone to remove it.

Facebook Comments Box

Upper Deck Sides

Clamping in first Plank Upper Deck

The Planks go from 5mm down to 1.87mm, straight Taper.

This is when the Ibex Plane really works great!!!

First upper
2nd one up
#4 getting ready to stick

I’m just using Dap Contact Cement and then after I put Superglue in the gaps.

#4 installed
Making the Upper Strakes
Finished Starboard side
Facebook Comments Box