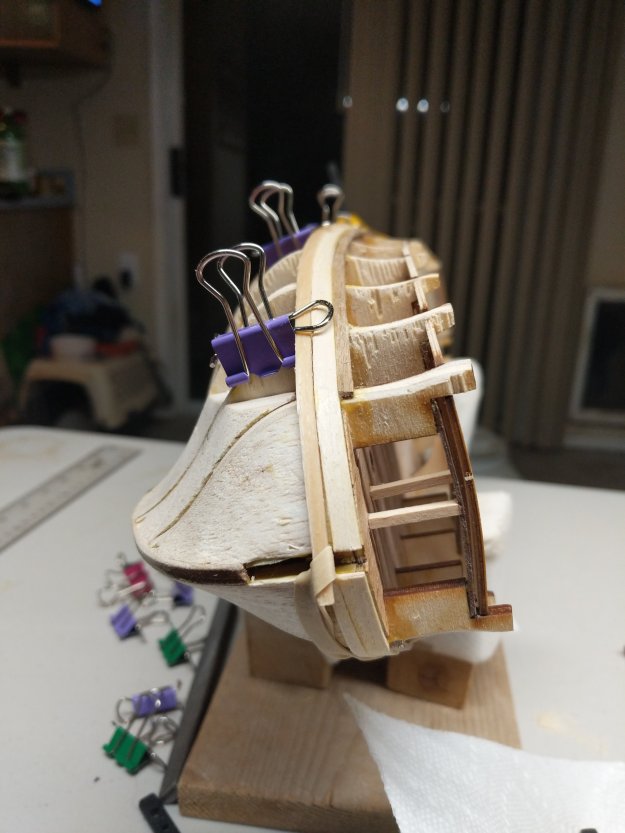
This Strake seems to be needing some bending. What I ended up doing was to go ahead and glue the forward part and to let it set. Then, I’ll go ahead and twist it on around to the Stern.
I imagine that if I was doing shorter Plank sections and doing Butt Joints instead of a continuous Strake, things would go differently.
#7 Strake Starboard side gluing forward part
I kind of goofed on the Starboard side. I ended up clamping it too hard and it caved in the bottom part of #7. I’m not worried about it… I’ll just fix it with some Putty.
A strake is a course of the planking or plating of the hull of a vessel. In a wooden construction it is a strip of planking (or multiple planks combined into one) running longitudinally along the vessel’s bottom and sides. In a metal ship it is a course of plating.
Strakes are fastened to the bow at its stem at the front of a ship and stern at its transom at its rear.
In boat and ship construction the strake immediately adjacent to either side of the keel is known as the garboard strake or A strake. The next two are the first broad or B strake and second broad or C strake. Working upward come the bottom strakes, lowers, bilge strakes, topside strakes, and uppers also named sequentially as the D strake, E strake, etc. The uppermost along the topsides is called the sheer strake.[1] Strakes are joined to the stem by their hood ends.[2]
A rubbing strake was traditionally built in just below a carvel sheer strake. It was much less broad but thicker than other strakes so that it projected and took any rubbing against piers or other boats when the boat was in use. In clinker boats, the rubbing strake was applied to the outside of the sheer strake. Many current pleasure craft reflect this history in that they have a mechanically attached (and therefore replaceable) rub rail at the location formerly occupied by a rubbing strake, often doubling to cover the joint between a GRP hull and its innerliner.
A stealer is a short strake employed to reduce the width of plank required where the girth of the hull increases or to accommodate a tuck in the shape. It is commonly employed in carvel and iron/steel shipbuilding, but very few clinker craft use them.
So I ended up screwing up once again and bent the Planks in the wrong direction!!!
So now, I’m having to wait for the other pre-soaked Planks to bend.
I’m still getting Splintering though… Even with Ammonia. I may leave it in a bit longer than 1 hour next time.
Splintering… Very annoying 🤔😤#3 Strake Starboard sideStrake #4 Starboard side
I’m kind of annoyed at myself for not taking in the edges of the Planks as it makes the turn… I forgot to do it. It’s really kind of minor but it’s something that “should” be done… Hmmm
From Planking Techniques for Model Ship Builders by Donald Dressel
I went and messed up with the bending of the #3 Strake on the Starboard side.
I had to use that Strake on the Port side, so therefore I’m doubling up on the Starboard side Strakes 3 & 4.
Here I’m bending the next 2 and have the #4 Strake being glued into the Port side…
All I can is to be careful with the bending and make sure you pencil mark each Strake with both the P & S, Forward Arrow, and the Up Arrow to avoid such mistakes. 😲🤔🙄
I’ll update more once I have #3 & #4 on on the Starboard side.
It appears that #4 Strake is landing nicely on the Transom
So far, so good… Although I’m not really happy with the wood that Mamoli gave me in the kit… I guess the consolation is that this is only the inner Plank and an outer Walnut one will go over it.
Port Side 3rd Stake taking bend
Speaking of Wood… I wasn’t very impressed with the Wood for the Bulkhead either. This will probably be the last kit that I buy from this company.
Although their laser cut parts aren’t too bad. But their Instructions are very poor. This is definitely NOT a kit for a beginner!!!
Strake swollen from soaking.
I put a picture of the Strake that I’ve had in the Water for about an hour. Perhaps I’ll go a little less than that because it swelled up really good. It’s probably a good 1 – 1.5mm thicker than it should be!
Port Side gluing in… As you can see, I finally had to resort to using Pins 😲🤔🙄Port Side glued inPlank Bending Jig working on next Plank… #3 Starboard Side
I will have 12 Planks that will fit in the Upper Band.
Therefore, 12 5mm Planks have to fit in the space with only 26mm worth of space in Frame 1.
First Strake taking the bend
I know different people have different methods. Some may ask why I don’t just use a Plank Bender. I’m not a fan of how a Plank Bender breaks the wood in order to simulate “bending”. I enjoy making the wood take the bends as natural to the wood as I can possibly get it.
Just showing the taper. I went down from 5mm to around 2.5mmPort Side gluing inStarboard Side taking bend. This time I used a Rubber band
Hmmm… Just noticed this little error…
Guess I’ll fix it with some Putty later.
I’m trying to avoid using Pins as much possible… Although the possibility still exists where I may need to resort to using them.
I did order some Planking Clamps for MicroMark but it’s on back order so I doubt it will get here on time for this project.