Tag Archives: Transom

Lower Gallery / Transom

Filled in Gap with Plastic Wood

I had to order some more .5 x 3mm Tanganyika to finish the Upper Hull so I decided to work on the Gallery while I’m waiting.

The first thing I had to do was to open up the Hole a lot bigger for the Rudder Post to go into.

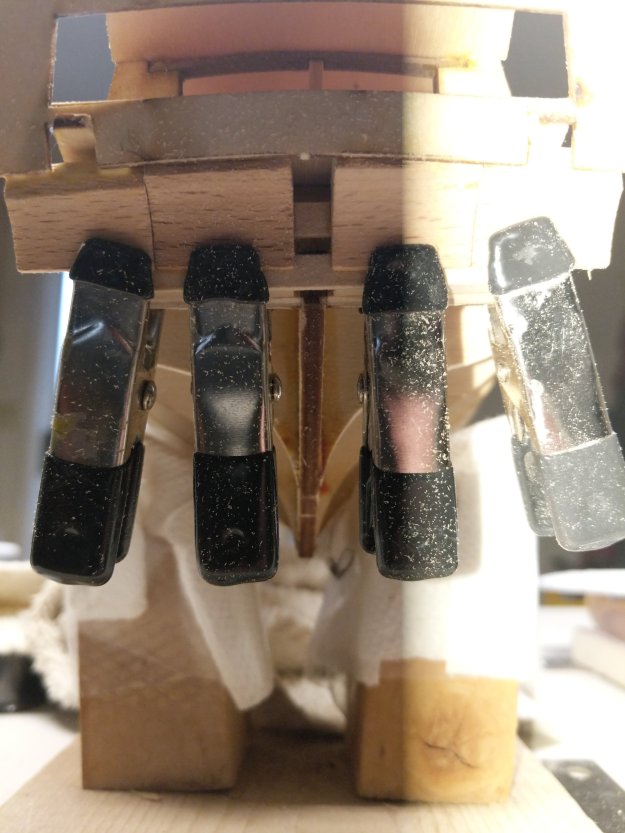
Then, I filled in the Gap with some Plastic Wood so that I can Plank it with some 1.5 x 2mm Walnut.

Planking Transom

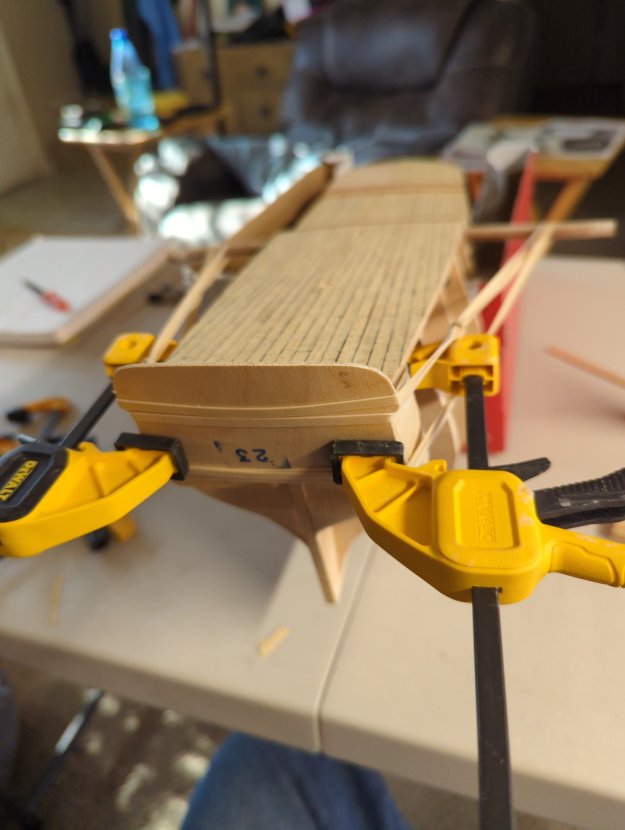
I am using 1.5 x 3mm Walnut Wood for the Transom Planking. The kit specified 1.5 x 2mm but the Wood they provided was less than desirable! .. 😫🙄😲

I am using White Glue to glue the Planks. No Clamps.

N

Planks overlapped

This is Pre-Sanding…

Transom

Rubber band Vise

I had to add some lumber to the Transom to bring the entire thing out in a Curve.

Shaped upper portion

I had to include this Filler Blocks because the Fillers for the aft section didn’t go out far enough.

Rubber Band Vise
Look at that gap… 🤔🙄

I’m not sure if I’m going about this the hard way…

I suppose I could have simply shaved the Poop Deck down a bit… 🙄🤔🫢

I am just thinking ahead… I’m sure the Planking will hide a lot of flaws. These ships were constantly being modified anyway, especially this one. It was supposed to have a beefed up hull to better withstand any ice that they encountered. 😲

Had to put fillers on sides
Cutting out Piece 22a
These Windows are a Monster to get out

Currently I’m using a Scribe to puncture miniature Holes in the Wood. I’m hoping to scrape the wood from the other side!

Had to use Punch and Dremel in that order
Gluing Stern Balcony

Transom Planking

The Transom took these .5mm x 3mm Walnut Planks.

It kind of came out uneven so I had to make a Filler sliver. Then while the White Glue was still wet, I rubbed across it with the 120 Grit, just enough to generate a few Walnut Sawdust to act as Putty. Now the descrepancy is barely visible.

Sliver on right side
Transom Planking done
Close up of Rudder Hole

#4 Strake

I went and messed up with the bending of the #3 Strake on the Starboard side.

I had to use that Strake on the Port side, so therefore I’m doubling up on the Starboard side Strakes 3 & 4.

Here I’m bending the next 2 and have the #4 Strake being glued into the Port side…

All I can is to be careful with the bending and make sure you pencil mark each Strake with both the P & S, Forward Arrow, and the Up Arrow to avoid such mistakes. 😲🤔🙄

I’ll update more once I have #3 & #4 on on the Starboard side.

It appears that #4 Strake is landing nicely on the Transom

Transom

Attaching the Transom to the Stern.

This was another piece that I had to make a lot of adjustments to make it fit.

I had to add these little spacers in order to make the slope underneath the after cabin more asthetically appealing.

Also, I noticed that the bulkhead wasn’t quite aligned right so I took about 1mm off the Port side.

Adding some blocks to support the sloping section underneath the Transom
Gluing in the Sloping section “Drop” under Transom

I really had to fiddle with it to get it to fit! This section is made out of Beech wood… However I think I could have accomplished the same thing with any wood, even Balsa.

Transom completed
Yes it took a lot of filing

Transom

When I started put with this Transom piece, I found that it didn’t cover the Stern like I wanted it to. So I made this little filler piece as I started in a previous post.

Anyway, this is the finished piece before I put the top layer on it.

I realize that I got carried away with the Tamiya Wood Putty. I swear, this Putty is some strong stuff!

Transom

I glued it on with the Titebond and I had to hold while adjusting. I couldn’t use Superglue because it grabs too fast. The Titebond grabbed in around 10 minutes or so of holding which isn’t bad.

I’m looking at this Transom and I’m thinking that I may need to make something for the stern to fill that Gap in on the bottom of it.

I had this huge gap on the bottom of the Transom. What I did was to fashion a little flat filler piece from wood that I had from a previous kit.

I made this piece of wood as a filler
The glue is set.
Top view pre-sanding