Tag Archives: Planking

#5 Strake

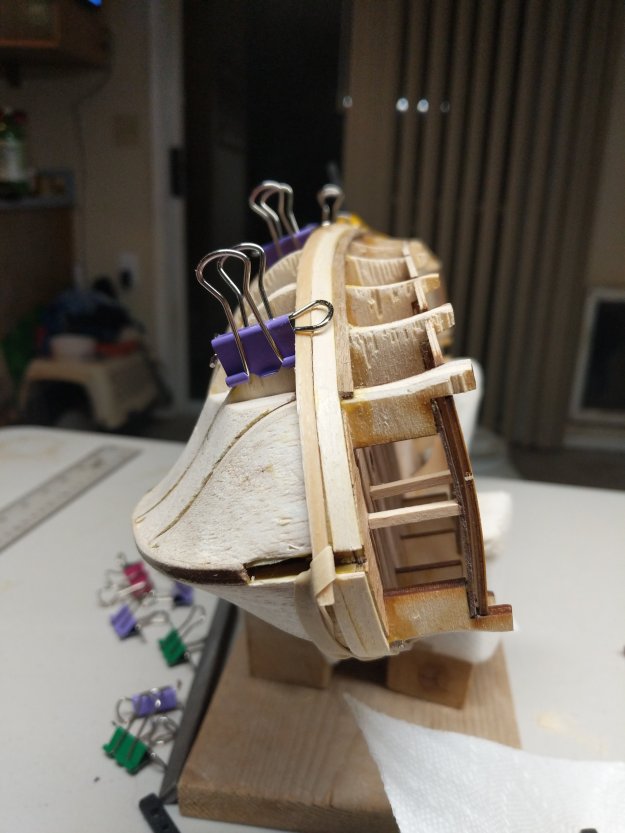
As I was gluing in the #5 Strake, I realized that I would have to force it up into the #4 Strake above it with a clamp.

Instead of doing that, I decided to leave a Gap where I’ll slide a Cheater into it. A Double pointed Wedge into this little Gap.

Gap between Bulkheads #6 – #12
I made this Double Wedge in order to fill it

I also have another Gap on the Bow which if I didn’t leave it would have given me a reverse Camber, so I’ll put some Putty in there to fill it up.

There’s a little Gap between #4 & #5 between #1 & #2 Bulkheads

The #5 Strake was laying nicely on the Port side so I didn’t have a gap like I did on the Starboard.

Starboard
Port

#3 & #4 Strake Starboard Side

So I ended up screwing up once again and bent the Planks in the wrong direction!!!

So now, I’m having to wait for the other pre-soaked Planks to bend.

I’m still getting Splintering though… Even with Ammonia. I may leave it in a bit longer than 1 hour next time.

Splintering… Very annoying 🤔😤
#3 Strake Starboard side
Strake #4 Starboard side

I’m kind of annoyed at myself for not taking in the edges of the Planks as it makes the turn… I forgot to do it. It’s really kind of minor but it’s something that “should” be done… Hmmm

From Planking Techniques for Model Ship Builders by Donald Dressel

Ammonia

I’m experimenting with adding Ammonia to the Water that I use for bending. I’m giving it about an hour’s worth of soaking to see how it turns out.

I used about 120 ml / approx 1/2 Cup of Ammonia, for this Tube that I use for Soaking.

I boil the water in the Kettle and mix it all together. There is a Screw on the top.

The problem I’m having is that the wood is splintering as I bend it. So hopefully this takes care of the problem… Hmmm 🤔🙄😲

Splintered Wood

I’m going to go ahead and use it… For all things considered with this Model, the 2nd Later is going to be some pretty thick Walnut Planks so I’m not too worried about how the 1st layer looks.

All I’m really concerned about is to do it in a classical fashion. It’s an exercise really.

#4 Strake

I went and messed up with the bending of the #3 Strake on the Starboard side.

I had to use that Strake on the Port side, so therefore I’m doubling up on the Starboard side Strakes 3 & 4.

Here I’m bending the next 2 and have the #4 Strake being glued into the Port side…

All I can is to be careful with the bending and make sure you pencil mark each Strake with both the P & S, Forward Arrow, and the Up Arrow to avoid such mistakes. 😲🤔🙄

I’ll update more once I have #3 & #4 on on the Starboard side.

It appears that #4 Strake is landing nicely on the Transom

Plank Bending Jig

I bought this Plank Bending Jig from MicroMark. I had forgotten all about it to be honest! Anyway, I’m using it now and so far it looks like it’s working pretty good. I suppose you can just make your own but I bought it to fill out my orders to over $75 bucks for the Free shipping.

One thing that I found annoying though. MicroMark gave you just enough of these little Washers to fit the Spacers. Well… I promptly lost one of the Washers and without it, it won’t tighten hard enough. So now I have to hassle around with buying some more!

#3 Strake

Here’s the 3rd Strake taking the bend.

So far, so good… Although I’m not really happy with the wood that Mamoli gave me in the kit… I guess the consolation is that this is only the inner Plank and an outer Walnut one will go over it.

Port Side 3rd Stake taking bend

Speaking of Wood… I wasn’t very impressed with the Wood for the Bulkhead either. This will probably be the last kit that I buy from this company.

Although their laser cut parts aren’t too bad. But their Instructions are very poor. This is definitely NOT a kit for a beginner!!!

Strake swollen from soaking.

I put a picture of the Strake that I’ve had in the Water for about an hour. Perhaps I’ll go a little less than that because it swelled up really good. It’s probably a good 1 – 1.5mm thicker than it should be!

Port Side gluing in… As you can see, I finally had to resort to using Pins 😲🤔🙄
Port Side glued in
Plank Bending Jig working on next Plank… #3 Starboard Side

#2 Strake

I will have 12 Planks that will fit in the Upper Band.

Therefore, 12 5mm Planks have to fit in the space with only 26mm worth of space in Frame 1.

First Strake taking the bend

I know different people have different methods. Some may ask why I don’t just use a Plank Bender. I’m not a fan of how a Plank Bender breaks the wood in order to simulate “bending”. I enjoy making the wood take the bends as natural to the wood as I can possibly get it.

Just showing the taper. I went down from 5mm to around 2.5mm
Port Side gluing in
Starboard Side taking bend. This time I used a Rubber band

Hmmm… Just noticed this little error…

Guess I’ll fix it with some Putty later.

I’m trying to avoid using Pins as much possible… Although the possibility still exists where I may need to resort to using them.

I did order some Planking Clamps for MicroMark but it’s on back order so I doubt it will get here on time for this project.

Different Methods of Determining Tapering

In my efforts to learn about planking, I ended up learning about three or four methods and here’s what I found out.

I think that’s the worst thing that you could do is to go by planking your boat haphazardly. You really need to make a plan and think about what you’re doing before you begin the project.

The first method that I learned was from the book Ship Modeling Simplified.

To be honest, I really wasn’t a big fan of this method because what they require you to do was to bend your plank around the Hull and at the point where the plank above it was your point x and for you to taper the playing from that point on to the Bow at the point where that plank met it.

The next method is the one that I’m using now. This method requires you to use a batten that divides the Hull of the ship into two bands. The upper band and a lower band.

Then what you have to do is to calculate out how much taper you’re going to need by mathematically finding out how small the Plank needs to be in order for it to squeeze into a certain space.

First you have to find out how many planks are going to be all the biggest part of the bulkhead, then you determine how you’re going to be able to squeeze that many planks into a limited space like the first bulkhead.

Another method is by using proportional dividers. I kind of have a hard time with this one because the proportional divider didn’t go small enough for the scale the ship that I was using but I’ll save that for later scale model which is bigger.

Like I said, there are as many methods as there are Model Makers. But this is my method. I’m not into it for speed production. Slow and Steady…

“Steady as she goes…” 🤣🤭😲